Case Study - The Dragon and Vines Short
Using Komotion for Maya
For this, there was a short specification:
Produce a 10 Second Video Clip – An animated scene where a sleeping Dragon creature forms in the scene from separate bones, wakes up, and takes off, while growing vines in the background approach and attempt to grab it (10+ seconds long)
All Animation and VFX use Skeletal Rigs produced by Komotion for Maya
All rigs and animations must export to game engine
Using only Autodesk Maya and Komotion for Maya,
we started by building the Dragon Rig Structure
The project is shown in the Komotion Demo video
Estimated Object Counts (Total = 1,193) - 160+ Bones - 1,033+ Controls
Total Rigging Time: 90 Minutes
Proof
What was required?
Only required knowledge of movement and using Komotion for Maya controls and configuration
The entire Dragon rig was built from scratch in that time just using Komotion for Maya
No technical knowledge required!
It’s fully procedural - no reliance on
templates or pre-built modules!
No additional custom scripts or tools required!
So, to build this from scratch without Komotion for Maya,
what’s required to at least attempt this?
Spline IK cache controls for all chains (structure chains can scatter and visually detach)
Default pose holder to reset changes to skeleton
Mirror and Flip for 9 component types – affect deformations on every chain
Handle control manipulation and group selections for productive use
Creating correct joint orients for 31 chains with bone counts between 2 and 56
IK handles with aimer controls
Deal with gimbal lock issues
Chain/joint/controller Inheritance
Aim, orient and point constraints (6-DOF flexibility)
From start to finish, building the Dragon rig without Komotion for Maya would take days to weeks,
even for an experienced rigger!
Building the Dragon Rig
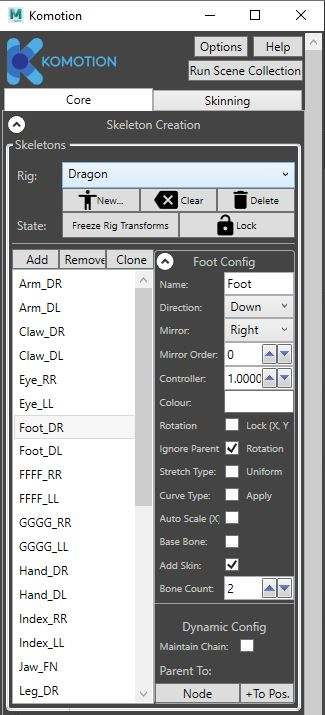
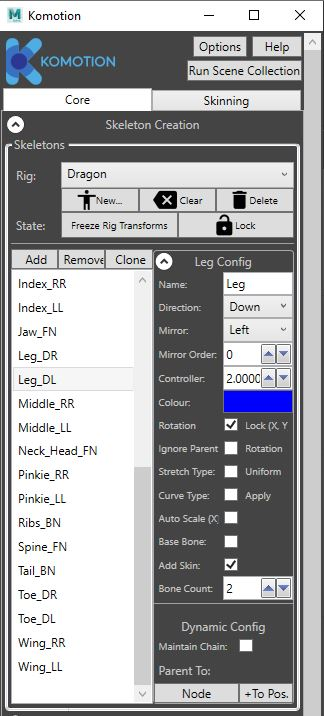
Each Bone Chain was individually configured and created procedurally from scratch through the Komotion UI below.
For building the structure in the scene, linking all of the chains together was automated and visual: it just required selecting the chain controller on the target parent chain in the scene, and setting the Bone Count to create the configured child chain.
After Chain Creation and linking, chains were manually moved around in the scene.
That’s all that was required!
Animating the Dragon Rig
After creating the structure, it was immediately ready to animate. In all Komotion bone chains, 11 combined animation systems are built-in, ready and always accessible.
Animation was purely visual interaction through the Komotion UI and Maya Viewport. Mirror and flip posing controls were used throughout for the legs and wings.
Animation of the wings in IK/FK was completely freeform with no limits. As the IK is 6-DOF, unique posing for the wings was effortless. Komotion Controls used to pose and animate the dragon:
Mirroring Controls - Quickly set poses for dragon wings, and these were then manipulated further
IK Controls - Planting the feet onto the floor, moving the tail, spine and more
FK Controls - Editing individual bones and group selection of bones
Root - Moving Root of structure (Pelvis) to position the hips (every chain has a root)
Inverse Rig - Rotate the pelvis of the rig around the back-leg Knees for positioning and posing
Inverse Rig - Rotate and position legs for the feet
Twist - Adjusting sub-hierarchy rotations
Rigging and Animating the Vines Rig
As with the Dragon Rig, individual bone chains with varying lengths were created in the scene, and then positioned as required. At the start, vines are present but not visible. During keyframing, they are extended and expanded to produce the growing and movement effect.
Komotion Controls used to pose and animate the vines:
FK Controls - Used to quickly stretch out and draft vine positions
Realign - (Spline Control) Set all spline paths back to their original reset state
Chain Ribbon - For refining Bone positioning after initial FK positioning of the chain spline
Thickness - Non-uniform scale to produce the growing effect using this control. Bone scale was set to zero, and then incrementally increased through keyframing
Spline Path Controls - Values were originally set to Zero (Chain Base) at the start, and increased incrementally for the travelling effect.
Final Summary
Ready to export to game engines, with no other preparation or technical work.
Estimated Total Time Taken for Everything: 30.5 hours
Rigging: 2.5 hours
Skinning: 3 hours
Animation: 25 hours
No other auto-rigging software, tools or frameworks can achieve this result at this level, in such a short time frame


